Welcome back to Think & Free. Here is Another Episode of the Express Learning Tutorial Series. But Not a Programming lesson. Today I will show you how to install GNU GCC Compiler on your Windows System. The GNU GCC Compiler comes with a MinGW Environment setup for Windows. MinGW is an Open Source Software Development Kit with GNU Projects. It is the best way to install the GNU GCC Compiler on Windows System. Let’s try to install the GNU GCC Compiler on a Windows System using the MinGW Development kit.
About MinGW
The MinGW – The Minimalist GNU for Windows, is a minimalist development environment for native Windows applications. It includes GNU Compiler Collection, C, C++, ADA, and Fortran compilers. MinGW is a Complete Open Source Project.
Let’s look at how to get and set up MinGW on Windows System. First We need to download the MinGW installer to our Windows system. To do that go to the official MinGW Web site and download a fresh copy of the latest version of the MinGW installer.
Download MingGW Installer
Here is the link for downloading the MinGW web installer setup. After the downloading process is done, go to the download location right-click on the downloaded setup file, and open it in Administrator mode.
Let’s Install GCC On Windows Using MinGW
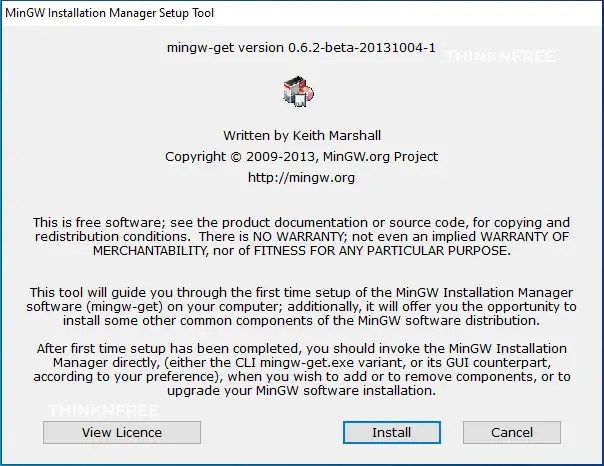
Now we can see the MinGW Installation Manager Setup Tool main window with some information notice about MinGW. On the top, we can see version information and some copywriting notices. See the left bottom side Install button. Go there and hit that Install button.
Now you can see Step 1: Specific Installation Preferences Window. This window provides the installation directory you need to install MinGW. Default Installation directory set to C:\MinGW. If you need to change it You can do it by selecting Change Option.
And This Window Provides some other Options called “User Interface Options“. If you need MinGW with only Command Line Interface you can remove the tick option in “… also install support for the graphical user interface option” or If you wish you need both CLI & GUI Options. No problem, you can stay with Defaults.
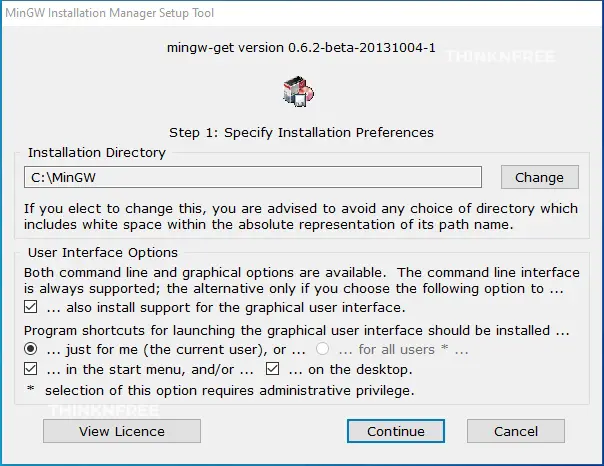
This window will ask you how they should be installed MinGW Program on your system. Is it just for you? or for all users? you can simply select it from there. After doing changes hit the Continue button in the bottom left corner. Wait a few seconds while Completing the Download MinGW installation manager.
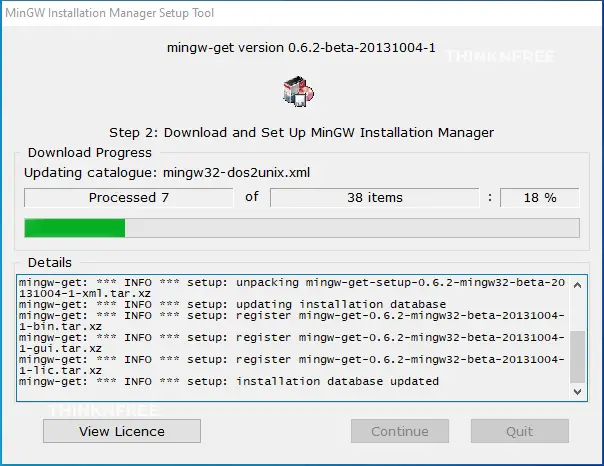
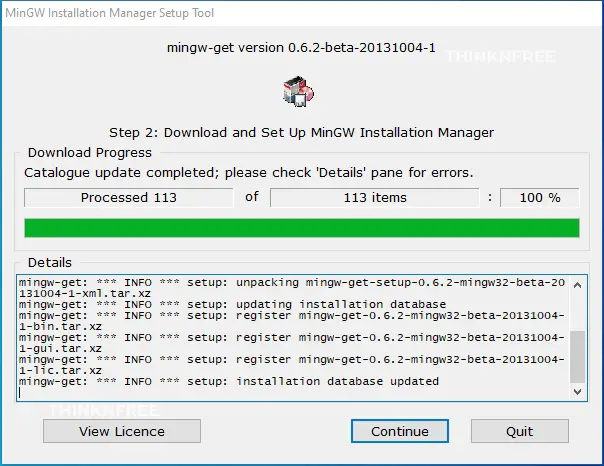
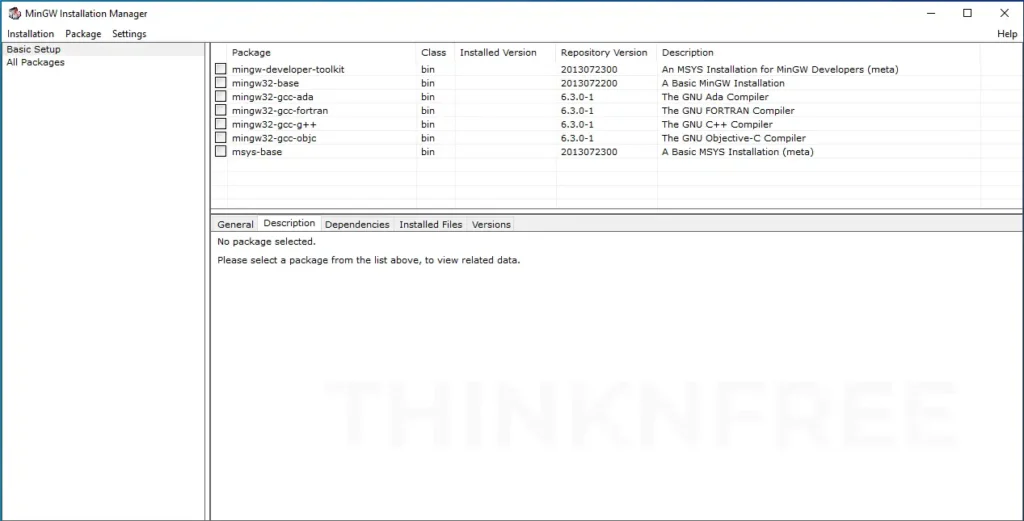
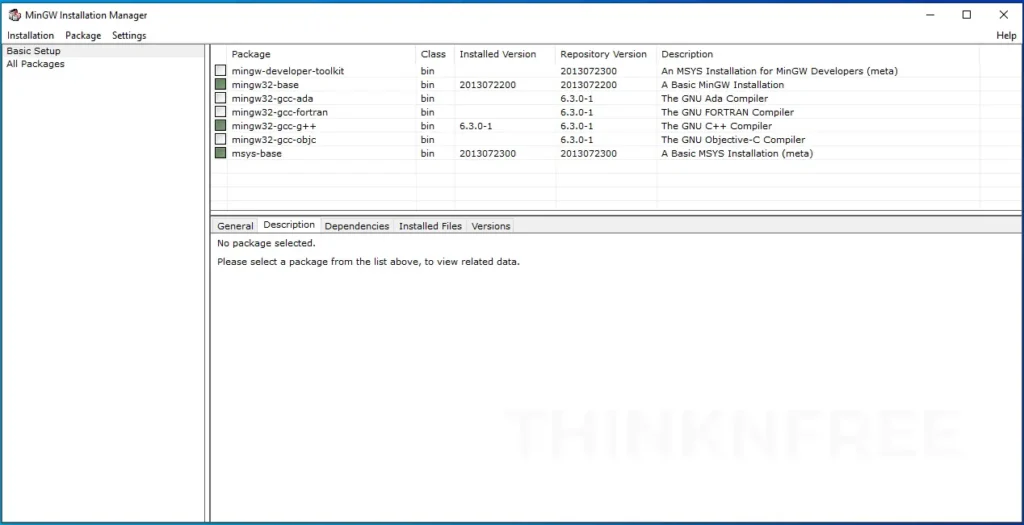
After the download process is completed, Hit the Continue Button in the Bottom left corner. Now you can see the MinGW Installation Manager Window will open. Go there and make sure, you were Selected Basic Setup in the left side pane. In the MinGW Installation Manager window, look at the right pane you can see what packages MinGW provides.
See the beginning of packages, you can see a little checkbox. go there and tap on it. Now you can see a little pop-up window with some options.
Downloading Packages to Install GCC
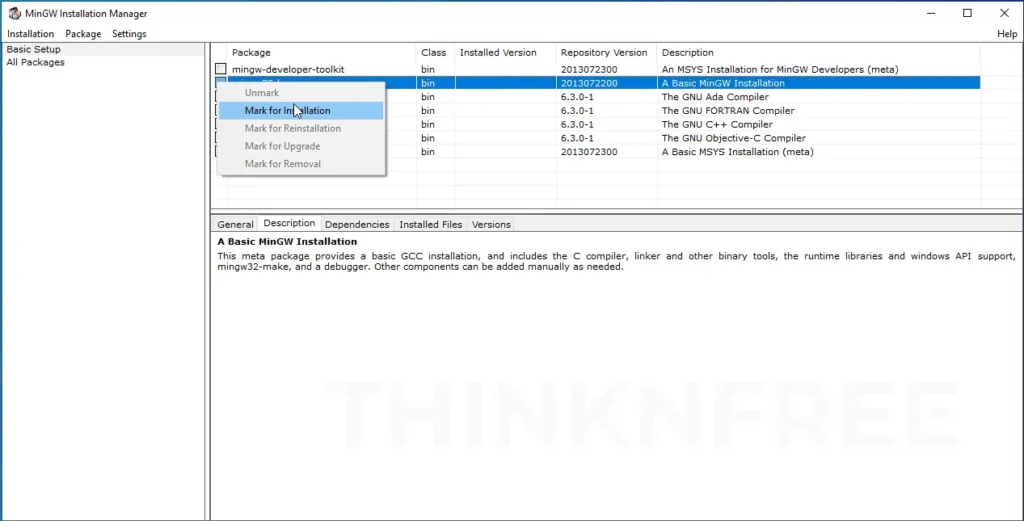
To install the GNU GCC Compiler on a Windows System, we must install these three of the packages.
- mingw32-base-bin
- mingw32-gcc-g++-bin
- msys-base-bin
You can mark for installation these three packages. One by one. Go to the beginning of these packages tap the little checkbox and select the option “Mark for Installation“.
Make sure you select correctly these three packages. Let’s download and install. Now go to the top left corner and select “Apply Changes” in the Installation menu.
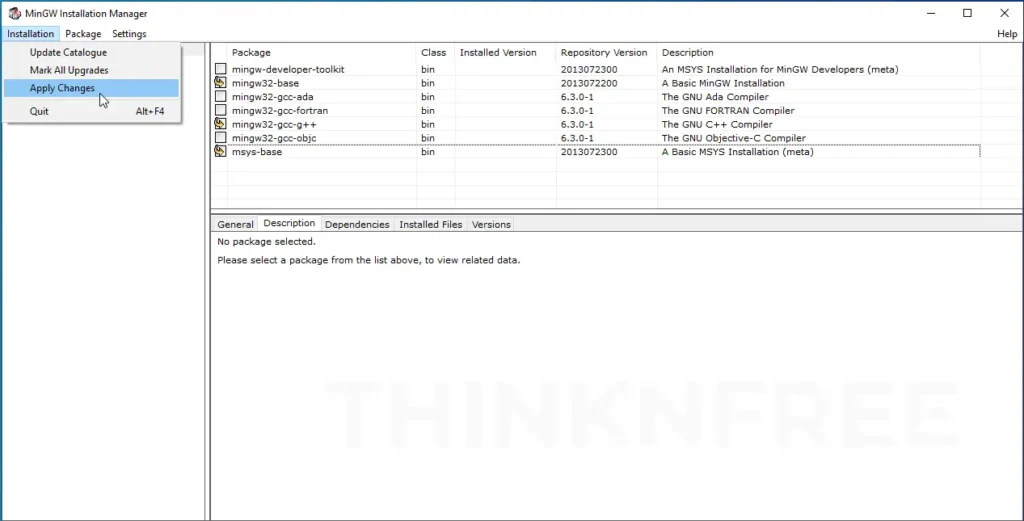
Now It will prompt another window named “Schedule of Pending Actions“. Hit the Apply button to install the selected packages in that window.
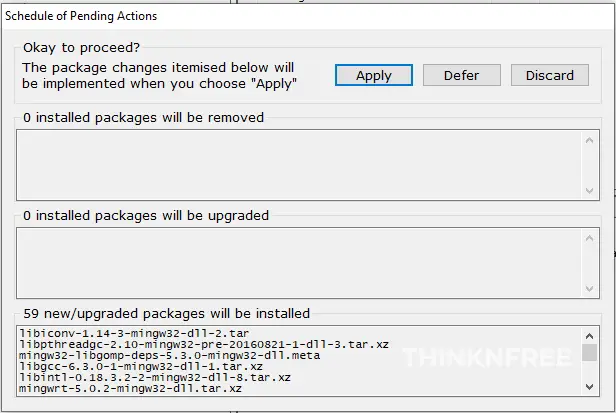
Now the Downloading Process has started, you can see a little window with progress level. Please wait a couple of minutes once this Downloading process is complete.

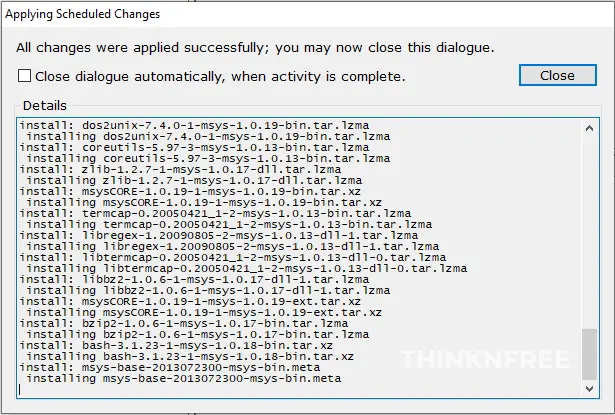
After the Downloading process is completed start the installer. and prompt a new window “Applying Scheduled Changes” Wait until the installation is done. After the complete installation is completed you can close that window.
Now you can see our package installation process has been completed. Make sure your MinGW Installation Window will Indicate a green color checkbox with selected Packages. That means the Installation Process is Completed.
That’s it about the installation process of MinGW on Windows. This has not ended yet. In the next lesson, we’ll look at how to use correctly MinGW with Path Variables in the Windows System. Leave a comment if you have some questions or anything about this.

I’m a tech-savvy writer and passionate software engineer who loves exploring the intersection of technology and creativity. Whether it’s building efficient systems or breaking down complex tech topics into simple words, I enjoy making technology accessible and useful for everyone.


Leave a Reply