Hey Everyone, Welcome to Think & Free. Today we are going to take a look at of some the coolest and productive Microsoft Visual Studio Code Editor Extensions. What are the Extensions? They will improve additional features & usability in Visual Studio Code Editor. Let’s look at the Top 5 of VS Code Productive extensions in, VS Code.
Visual Studio Code Editor
It is an Open-Source, text editor/ source code editor. Visual Studio Code is developed by Microsoft and it will support Microsoft Windows, Linux, and Mac Systems. Visual Studio Code is one of the top code editors in 2020. Some developers say “It was the best”. here is the official website link for the VS Code editor. get installed and try how it feels.
How to Open Up Extension Manager
In the Visual Studio Code Editor’s Left pane(Activity bar), you can see some icon, that looks like this. Go there and hover over that icon. By clicking on this icon you can open up the Extension Manager window in VS Code.
Visual Studio Code editor will provide a keyboard shortcut for opening this Extension Manager Window. this is the way to open up Extension Manager by using the Keyboard shortcut (ctrl+shift+x).
Now you can simply type the extension name and install it on your Visual Studio Code Editor. Let’s see, What are the top 5 coolest extensions/ plugins to VS code made easy to use?
01. Python Language Support for VS Code
Python is one of the most popular languages nowadays, If you’re a Python developer, I’m sure this is the best extension for your needs. Let’s see what is this extension and how to set it.
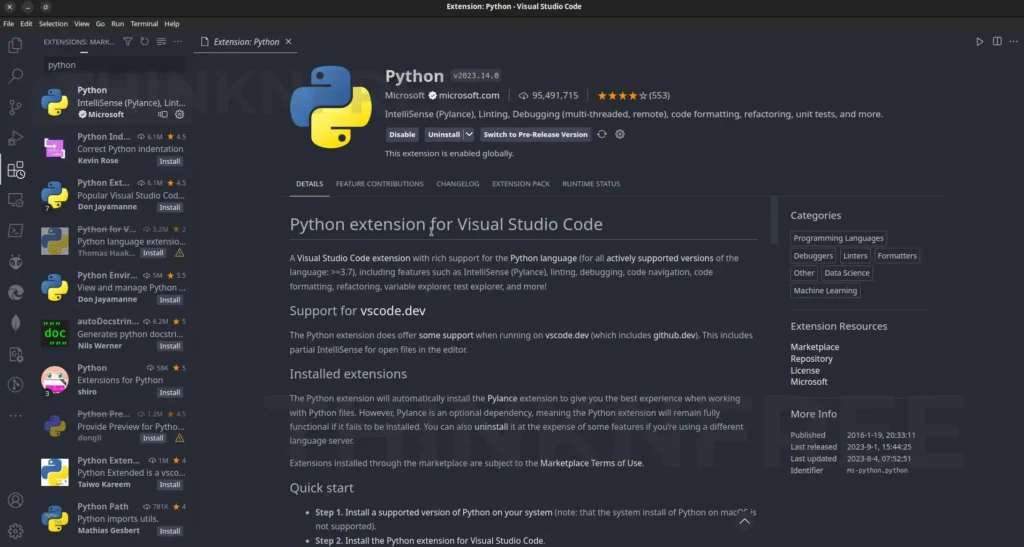
The Python Extension is a language support plugin for Visual Studio code editor. It supports, debugging, IntelliSense, linting, code navigation, code formatting, Jupyter Notebook support, refactoring, variable explorer, test explorer, snippets, and more. Before installing this extension on your VS Code Editor you must setup & install the Python programming environment on your system correctly. Make sure you have successfully installed Python on your system, Let’s see how to install this extension on our VS Code Editor.
- Step 01 – Open up Visual Studio Code Editor Extension Manager Window, Now type “python” in that little search box. And hit the enter key.
- Step 02 – click
"install"the button, and now the installation process has started. wait for done. - Step 03 – Once the installation process is completed, you can open your Python projects in Visual Studio Code Editor.
02. C/C++ Language Support for VS Code
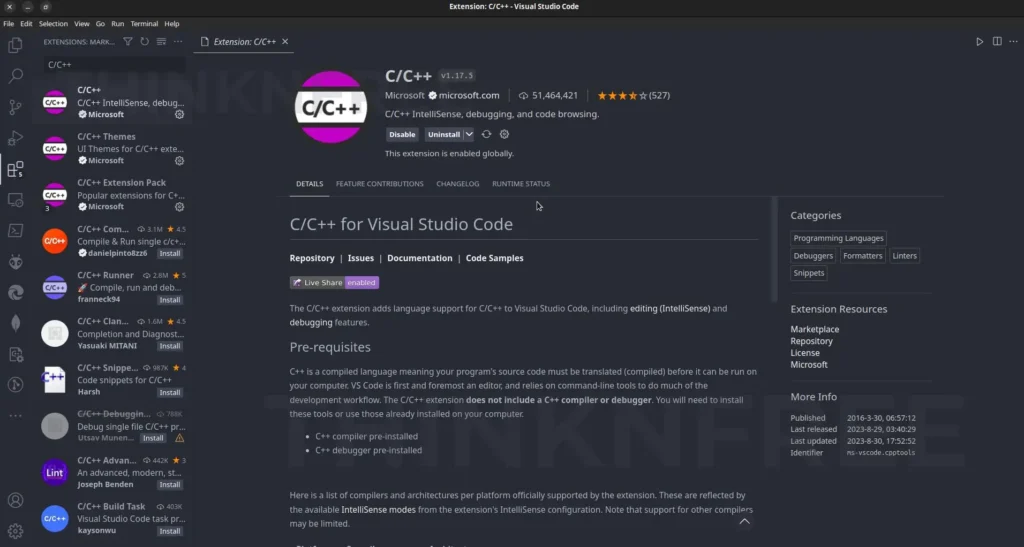
C/C++ is another language support extension for VS Code. It supports C & C++ languages with IntelliSense and debugging. before installing this extension you must install GCC on your system. In Windows, you need to install MinGW Environment. the reason is MinGW comes with GCC and other support tools for Microsoft Windows Systems.
In our previous lessons, In the C Programming Series, We covered some lessons on How to install MinGW and How to Set Environment Variables for GCC on a Windows System. If you do have not an idea, you can go there and get an idea about how to do it. Here is the way to install C/C++ Extension on Visual Studio Code Editor.
- Step 01 – Go to the Extension Manager and type “
C/C++“, now goes to the first option it will provide. - Step 02 – Click the “install”, option, and it will start the installation process. Once it is completed, you can start your C/C++ Projects in VS Code.
03. Live Server for VS Code
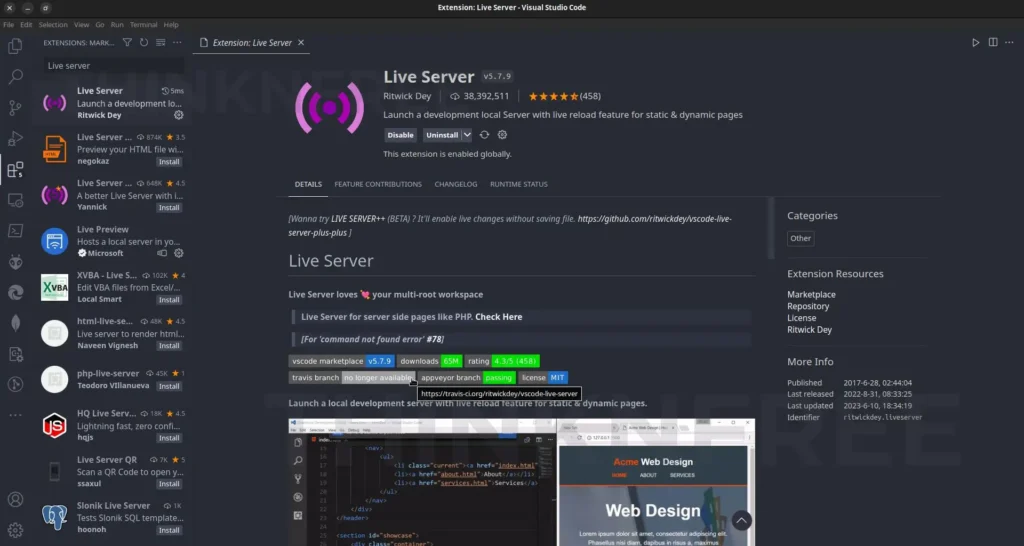
Live Server is another cool, some more usual Extension. it is a local server Extension and It will Provide a live reload feature for static & dynamic web pages. The installation process same as others. let’s look at how to use it.
- Step 01 – Open a project and click Go to Live from the status bar to turn the server on/off.
- Step 02 – Right-click on a
HTMLfile from Explorer Window and click onOpen with Live Server. - Step 03 – Open an HTML file right-click on the editor and click on
Open with Live Server. - Step 04 – Hit “
(alt+L, alt+O)” to Open the Server and “(alt+L, alt+C)” to Stop the server (You can change the shortcut from keybinding). [On MAC,cmd+L, cmd+Oandcmd+L, cmd+C] - Step 05 – Open the Command Palette by pressing
F1orctrl+shift+Pand typeLive Server: Open With Live Serverto start a server or typeLive Server: Stop Live Serverto stop a server.
04. PowerShell Language Support Extension for VS Code
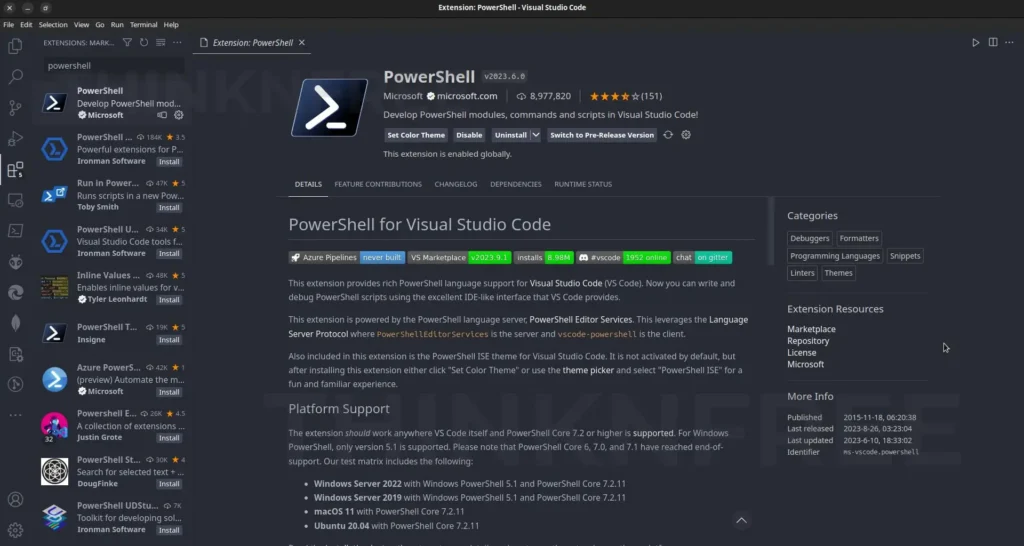
PowerShell Extension is a language support extension for PowerShell Scripts. It supports syntax highlighting, Code snippets, and more features. using this extension with VS Code Editor you can use VS Code as an IDE Program for PowerShell Scripting.
The installation Procedure is the same as other extensions, you can find this Extension on the Visual Studio Code Editor Extension Manager window. After installing it on Visual Studio Code Editor it will automatically, be configured for your Editor.
If you had some problem with setting up this extension on Visual Studio Code, here is the official documentation for PowerShell with Visual Studio Code.
05. One Dark Pro Theme for VS Code
Here is another extension, it’s actually not an extension. It was a theme. One Dark Pro is a Dark UI theme for VS Code, It is Atom’s iconic One Dark theme. One Dark Pro is the most downloaded theme for Visual Studio Code. Let’s see how to install One Dark Pro on Visual Studio Code Editor.
- step 01 – Go to Extensions and Search for “One Dark Pro“. And install it on your Visual Studio Code Editor.
- step 02 – After successfully installing the “One Dark Pro” Theme on your VS Code Editor, VS Code will prompt a little dialog box that will ask What do you want a color theme?
- step 03 – Now select “One Dark Pro” in there.
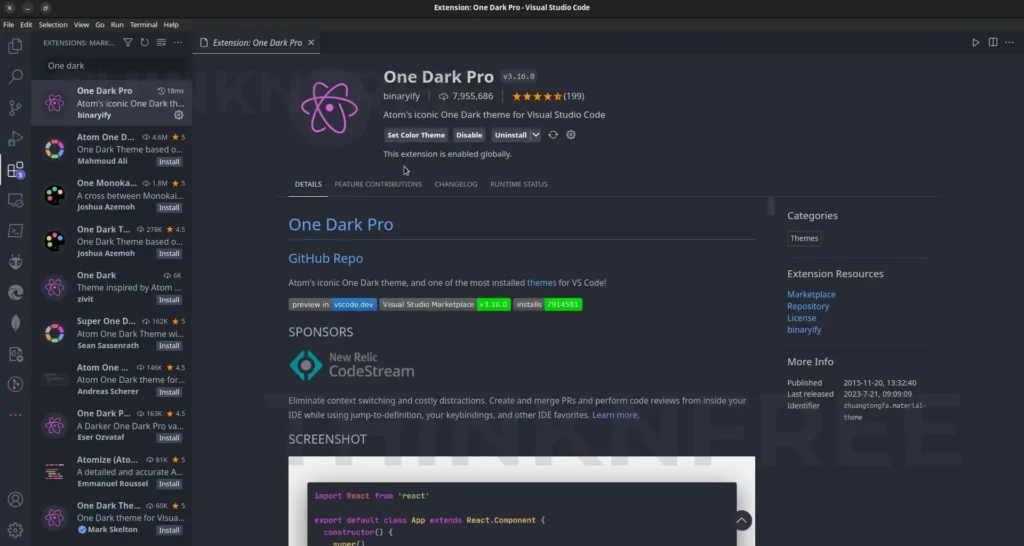
If after the installation VS Code didn’t prompt any dialog box? Go to File > Preferences > Color Theme. or you can use a shortcut for it. Here It is “Ctrl+K Ctrl+T“. Now you can see Atom One Dark in there select it, Now it’s automatically added to your Visual Studio Editor Color Theme.
If you have questions tell me your ideas about this in the comments. see you back soon with another day.

I’m a tech-savvy writer and passionate software engineer who loves exploring the intersection of technology and creativity. Whether it’s building efficient systems or breaking down complex tech topics into simple words, I enjoy making technology accessible and useful for everyone.


1 thought on “Top 5 Useful Extensions for VS Code Editor”