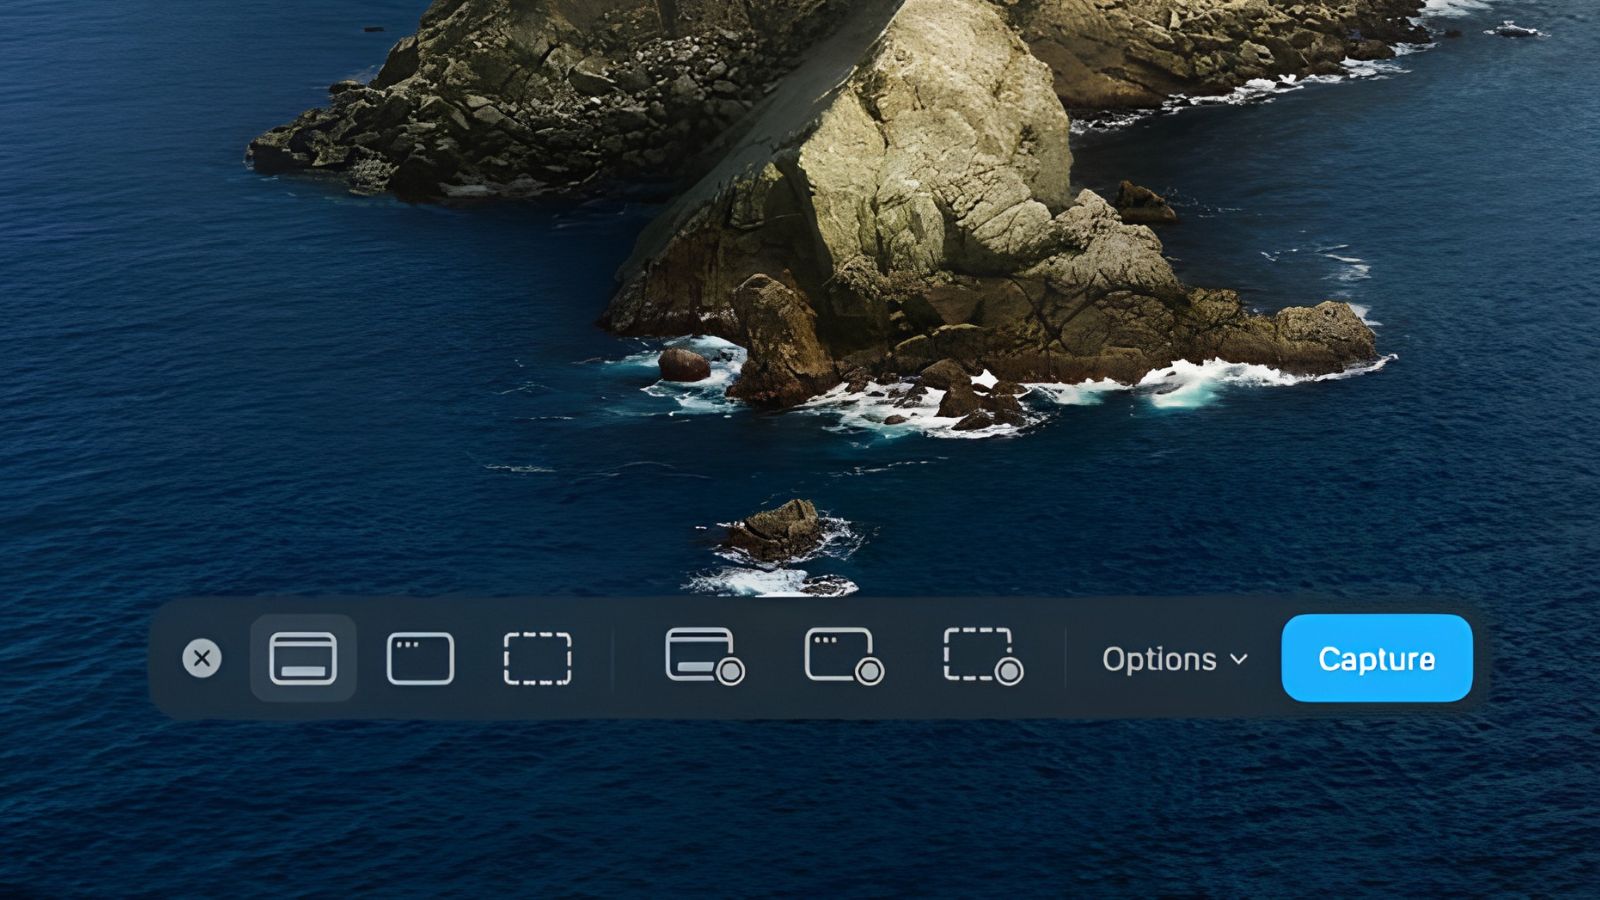
If you’ve ever needed to show someone exactly what’s happening on your screen instead of trying to explain it in words, you’ve probably searched how to record your screen on a Mac. The good news is you don’t need to download anything — macOS has had this built in for years. Let’s go through both ways to do it, and when you’d actually pick one over the other.
How to Record Your Screen on a Mac: 2 Built-In Methods
Both methods are completely free and already installed on your Mac. The first is the more modern, flexible option; the second is the older, simpler one that’s still worth knowing.
Method 1: The Screenshot App (Command + Shift + 5)
Press Command, Shift, and 5 at the same time, and a toolbar appears along the bottom of your screen with several icons. The two you want for recording let you choose between capturing your entire screen or just a selected portion you drag out with your mouse or trackpad.
Before you click record, click Options in that same toolbar first. This is where you pick where the recording saves (Desktop by default), choose a microphone if you want your voice included, set a countdown timer, and turn on Show Mouse Clicks, which puts a small black circle around your cursor every time you click, genuinely useful for tutorial-style recordings.
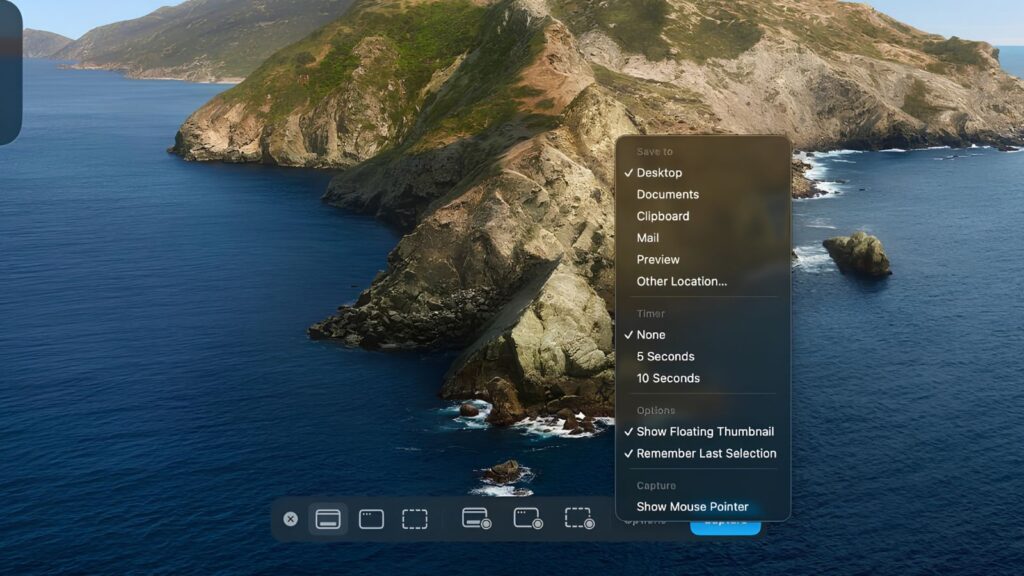
Once you’re happy with the settings, click Record. To stop, click the stop icon that appears in the menu bar at the top of your screen, or press Command, Control, and Escape together. Apple’s own screen recording guide covers every option in the toolbar if you want the full reference.
Method 2: QuickTime Player’s Screen Recording
If you’re more comfortable with QuickTime Player, or you’re on an older setup where you’d rather use an app window than a floating toolbar, open QuickTime Player, then go to File, then New Screen Recording. This opens a similar recording control with a dropdown arrow next to the record button, where you can pick a microphone before you start. Click the record button, then click anywhere on your screen to record everything, or drag out a specific area first. Stop the same way, using the menu bar stop icon.
What Happens to the Recording Afterward
Whichever method you use, the finished video saves as a .mov file, generally to your Desktop unless you changed the save location in Options first. .mov files play natively in QuickTime Player and are also easy to trim, since QuickTime lets you open a recording and use Edit, then Trim, to cut the start or end without any extra software.
Which Method Should You Actually Use?
For most people, the Screenshot app (Command, Shift, and 5) is the better default: it has more built-in options, doesn’t require opening a separate app first, and the Show Mouse Clicks setting alone makes it worth using over QuickTime for anything tutorial-related. QuickTime’s screen recording is worth knowing as a backup, or if you specifically prefer working inside an app window rather than a floating toolbar.
Frequently Asked Questions
Does how to record your screen on a Mac work the same way on every macOS version?
The Command, Shift, and 5 shortcut has been available since macOS Mojave (10.14). On older versions, QuickTime Player’s New Screen Recording option is the one to use instead.
Can I record audio along with my screen on a Mac?
Yes, both methods let you select a microphone before recording starts, so your voice gets captured alongside the screen. Neither method records internal system audio (like a video playing) without additional software.
Where do Mac screen recordings get saved?
By default, recordings save to your Desktop as a .mov file. Using the Screenshot app, you can change this in Options before recording; QuickTime always saves to Desktop unless you move the file afterward.
Command, Shift, and 5 is the shortcut worth memorizing here — it covers nearly everything most people need a screen recording for. If it’s a frozen app rather than a recording you’re dealing with on the same Mac, our guide on force quitting on Mac covers that instead, and our guide on showing hidden files on Mac is worth a look too if Finder’s the thing giving you trouble.

I’m a tech-savvy writer and passionate software engineer who loves exploring the intersection of technology and creativity. Whether it’s building efficient systems or breaking down complex tech topics into simple words, I enjoy making technology accessible and useful for everyone.





Leave a Reply